 Plushify
Now that we have an .obj file that Plushify can import and work with it as well as a Plushify account, let us have a closer look at how to import that .obj file.
Opening the Create Dialog
If it's the first time you are using Plushify, scroll down on the page and click on the "Create your first project" button. You can also use the "Create New Project" entry in the Account menu, which is also available if you already created some projects. Clicking either of those buttons opens the "Create a new Project" dialog, where you can upload your .obj file. You can either drop the .obj file into the highlighted area or click on the area and select the .obj in the file system dialog.
Aligning the plushie
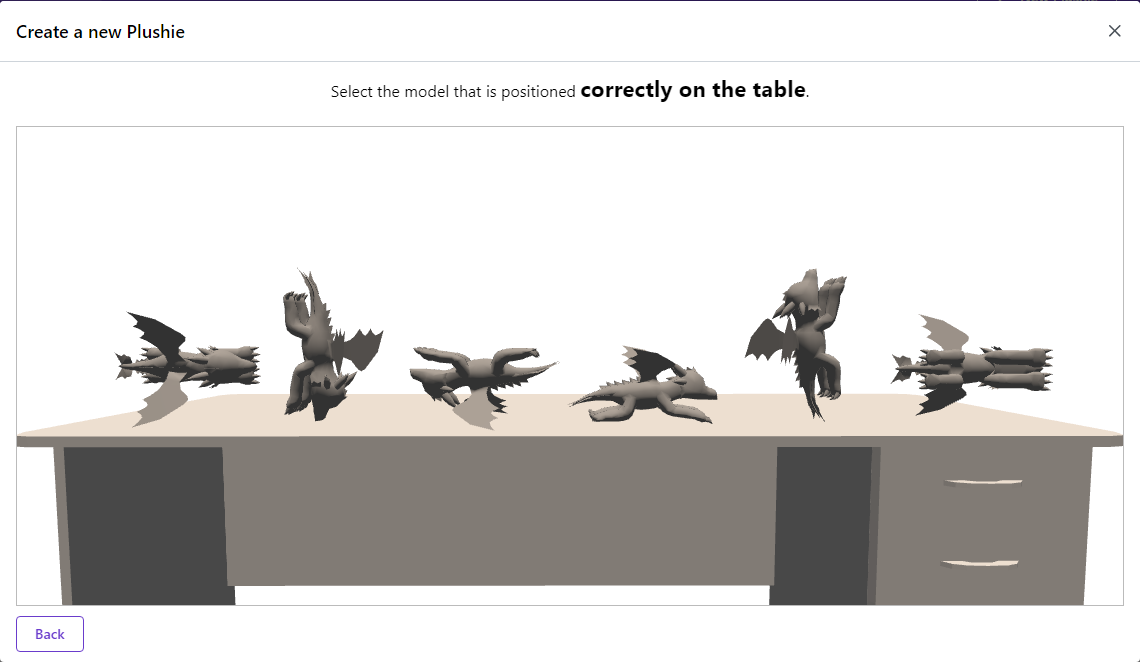
If your .obj file is uploaded successfully, you will see a rendering of six different poses for the model. You need to select the one where the model is placed correctly on the table. If you have a standing plushie, it should stand on the table; if it is sitting, it should sit on the table, and so on.
After selecting the model that is positioned correctly, you will see four different models where you need to select the one that is looking to the right.
These two steps are to ensure that the model is aligned correctly. There is no standard convention about which axis is up and front for .obj files. Plushify works best if the model is facing the correct way. Selecting the correct poses ensure the right setting.
If you have a model that has no defined up and front (e.g. if you are making a donut plushie), you can select the pose that looks most natural.
Using an existing UV map
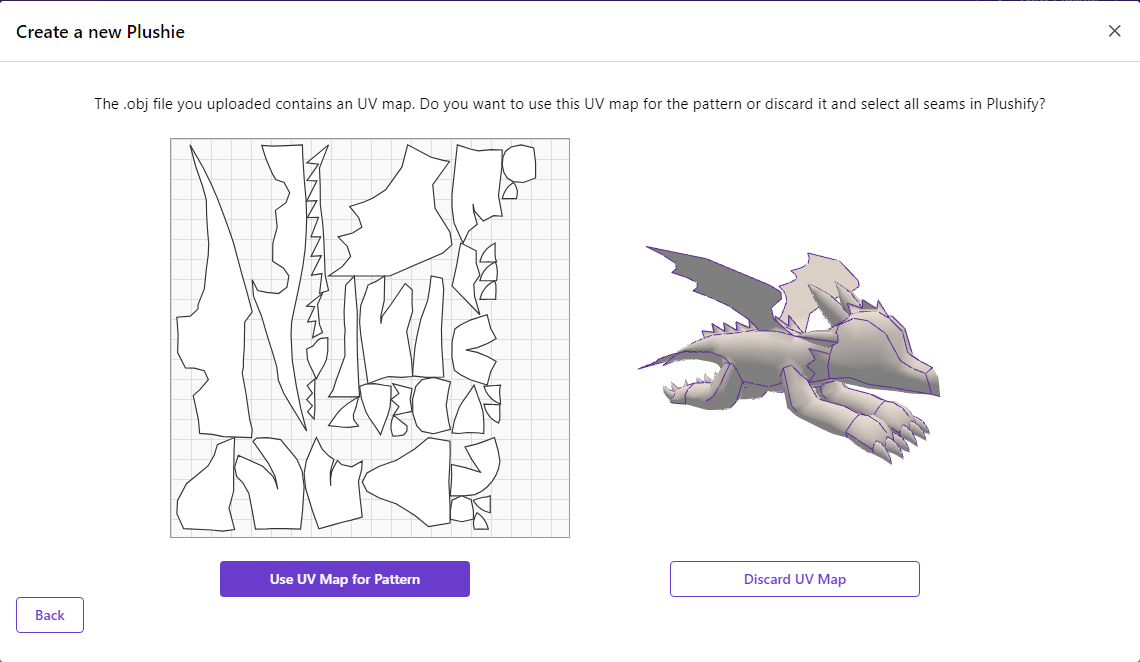
This step is only available if the .obj file contains an UV map. In this case, the UV map can be used as pattern for the project.
You will see a simplified version of the UV map on the left. Please not that this UV map likely differs from the UV map included in the .obj file. Plushies are often symmetrical so that the same piece can be used for the left and right side. Plushify automatically identifies such pieces and will include pieces which can be used for both the left and right side only once, saving paper when printing the pattern.
You can choose to use the UV map as basis for the pattern. When selecting this option, you can still adjust the seams later in Plushify which will cause the pattern to change and the UV map to be regenerated by Plushify.
Alternatively, you can discard the UV map. In this case, the project will not have a pattern and you need to set seams in Plushify in order to generate the pattern.
After uploading the model you either land on the page to select seams (if the uploaded file does not contain an UV map or you chose to discard it) or on the pattern view (if you chose to use an existing UV map as pattern).
On the left you have multiple buttons to switch between the functional sections of Plushify: Seams, Pattern, Fabrics, Details, Size and Print. The next chapters explain all those sections in more detail.
Next chapter: Specifying Seams