 Plushify
With your plushie configured exactly how you want to have it, it's time for printing the pattern. To do that, click on the "Print" section on the left of the plushie page.
Defining the page size
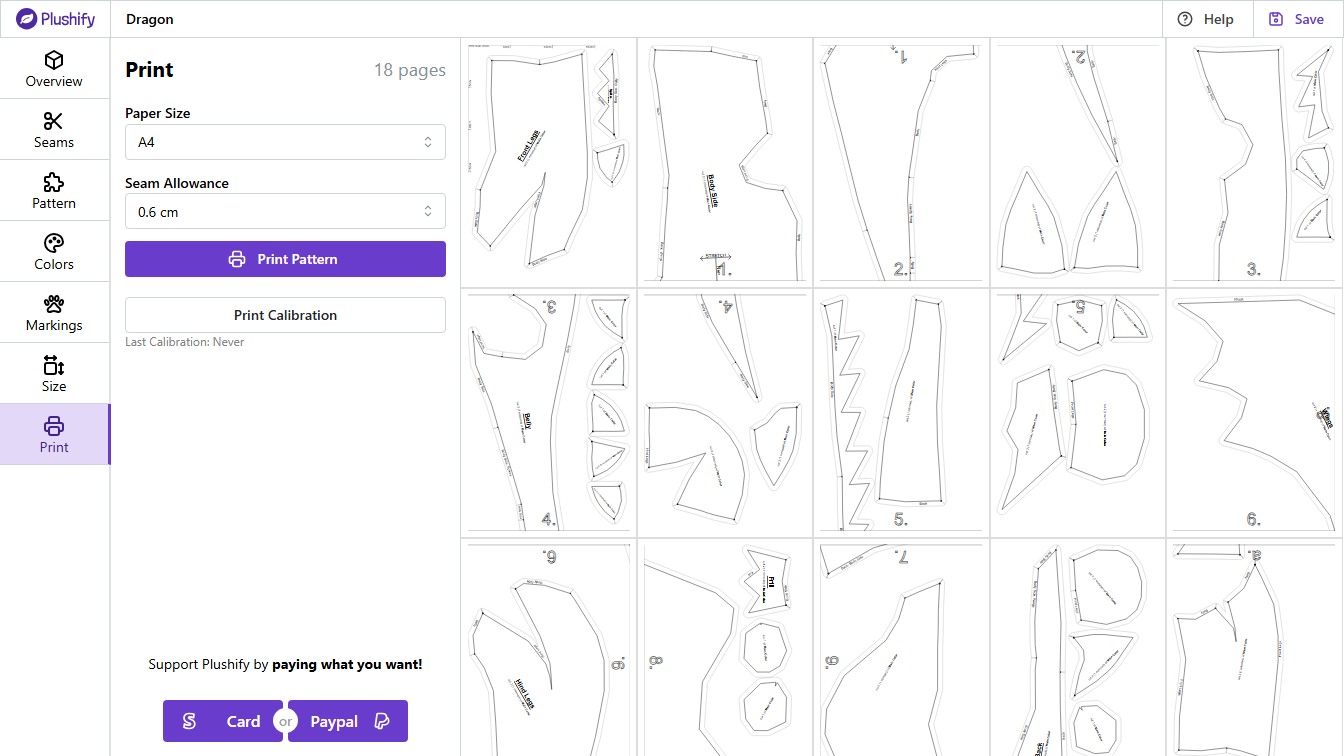
Plushify can generate a print layout for different paper sizes. In the paper size dropdown, choose the size you want to print. If you are making a big plushie and have a large printer, it's better to choose a larger paper format to minimize tiling. But Plushify can also print the pattern for plushies any size if you only have a standard A4 or letter size printer, you just have to glue multiple pages together.
To ensure Plushify and the printing dialog stays responsive, the total number of pages that can be printed at once is 100. If your pattern includes more than 100 pages, you can select which pages to print by using the dropdown next to the paper size selection.
Calibrate Print settings
Every printer has slight variations in how content is printed. To ensure that Plushify generates a layout that is compatible with your printer and pattern pieces are printed in the correct size, you can calibrate the print settings.
In this two step process, you first confirm printing margins that depend on your printer and browser. In a second step, you print a calibration page and measure two real-world distances on the printed page. Plushify will use this measurements to offset potential variations in how your printer scales content.
After you calibrate the print settings, it is important to print the pattern with the same printer and configuration that you used in the calibration process. Otherwise the pattern layout or scale could be incorrect.
Verifying printing scale
In the top left corner of the first page of the pattern you find a "Print Scale Check" which allows you to verify that the pattern was printed in the correct size. Just measure the marks on the paper and confirm that they have the length indicated. We recommend printing the first page of the pattern to verify the printing scale before printing the rest of the pages.
If the print scale check does not align with real-world sizes, the pattern was printed too small or too large. The pattern pieces will still fit together, but the final plushie size might be different from the size specified in Plushify. If this bothers you, you can recalibrate the print settings using the steps outlined above.
Combining large pieces
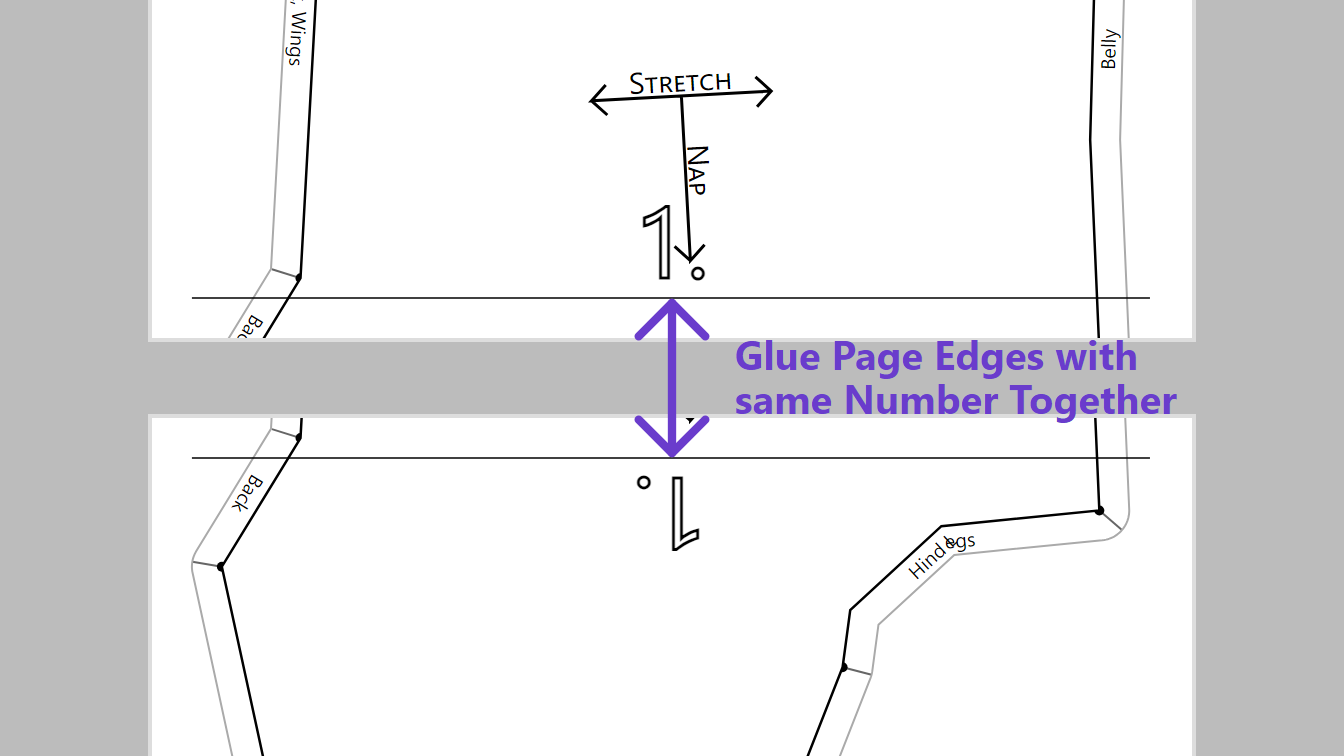
For big plushies, some pattern pieces might not fit on a single sheet of paper. In this case, the piece will be printed on multiple pages and you have to glue them together after printing.
To help you with this process, pages which need to be glued together have a number or letter at the edge. After printing the complete pattern, find the two pages with the same number or letter. On one page, cut away the paper at the edge and align it with the other page so that the printed edge line match. Then, glue both pages together at that line.
After combining all pages for a pattern piece, you can cut it out and use it to transfer it to the fabric. The printed pattern includes the seam allowance you have set so you can use that as a guide. When sewing the pieces together, use the darker line of the pattern.
Reading the pattern
Every pattern piece contains information to help you work with it. Besides the name of the pattern piece it contains an indicator for the fur direction as well as information about adjacent pieces.
Cutting Instructions
Every piece contains information about how many copies of it need to cut from which fabric. Plushify prints only one instance for symmetrical pieces, e.g. for the left and right side of the plushie. As a result, you might need to cut out a mirrored copy of the pattern piece. To mirror a pattern piece, simply flip it over so that the text is on the other side of the paper.
The printed side of the pattern piece represents the right side of the fabric. When cutting the fabric from the backside (the inner side), make sure to turn around the paper pattern so the text is facing the fabric and not visible, unless you are cutting a mirrored copy.
Fur Direction
In the Pattern section you can set the fur direction of the pattern piece. This is to make sure that the fur falls nicely in a consistent direction.
On the printed pattern, the fur direction is displayed with two arrows indicating the nap and stretch of the fabric. Some very small pieces might not have this indicator.
Edge Indicators for adjacent pieces
Every piece of the pattern has to be sewn to another piece. The seam allowance of every pattern piece is partitioned into multiple section. Each section has to be sewn to another piece. The name of the piece every section has to be sewn to is written inside the seam allowance.
If you take the corresponding piece that has to be sewn to the edge, you will find a corresponding edge that is marked with the name of the original pattern piece. Sew both of the pieces together to form the seam.
If there is no name for some or all of the seam sections, make sure that you have set a name for every pattern piece in the Pattern section.
Downloading the pattern as .svg file Pro Only
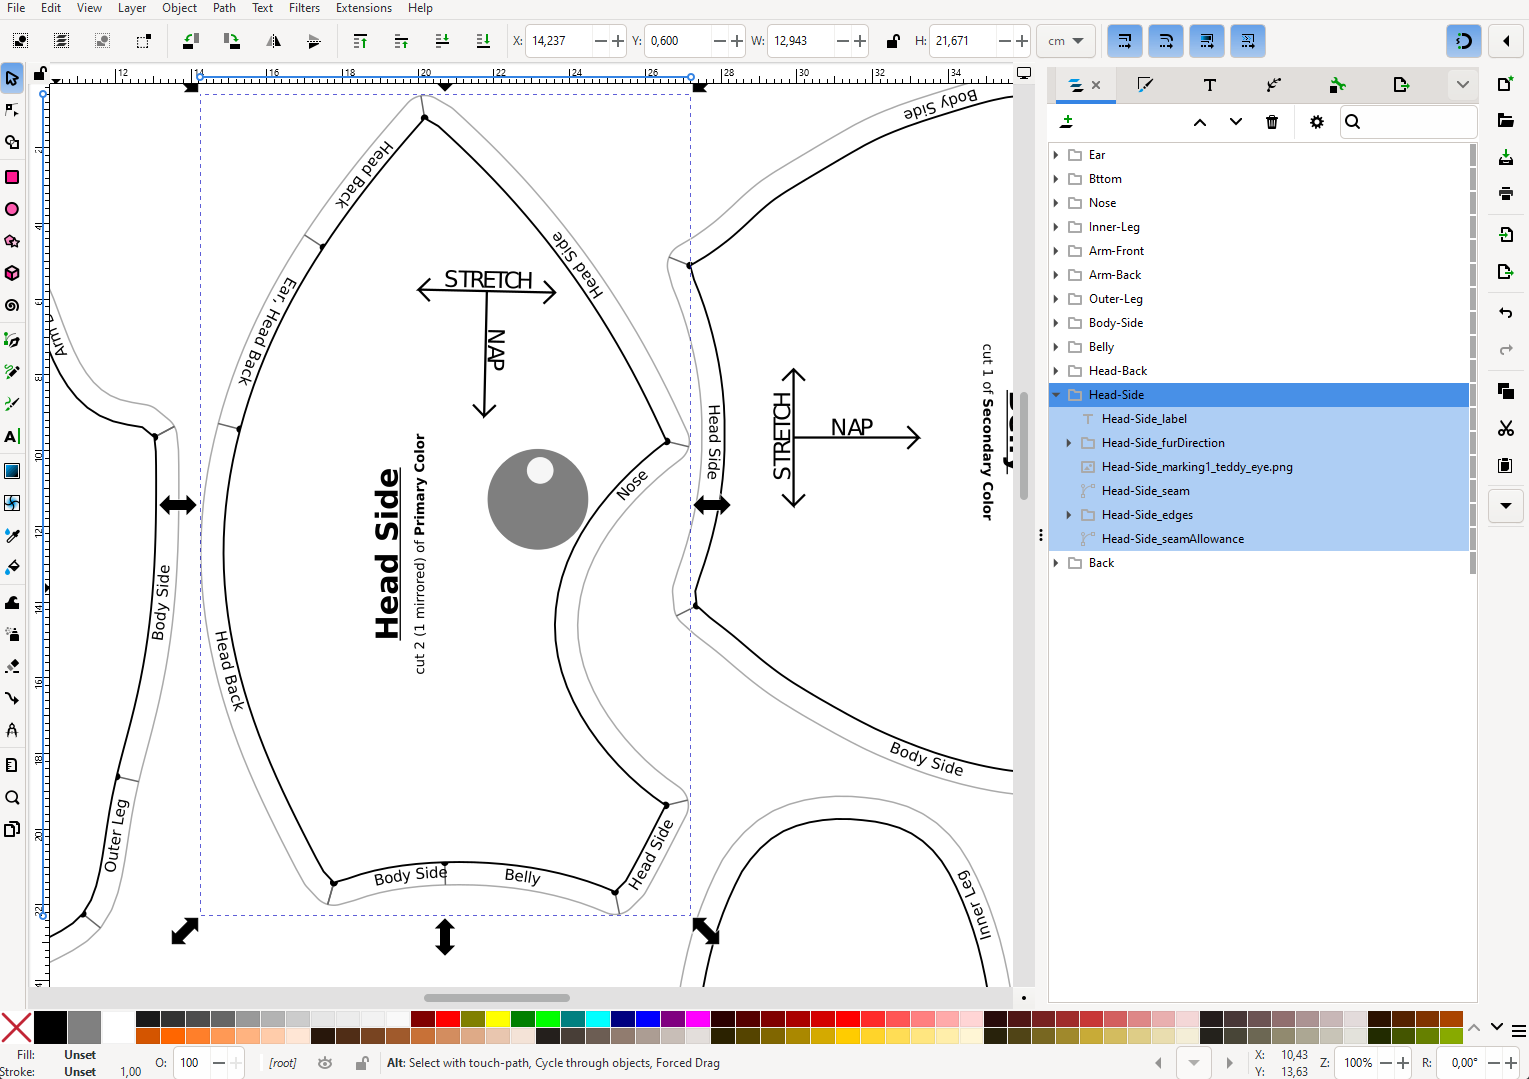
If you need more customization for printing the pattern, you can download it as a .svg file and edit it in an external program like Adobe Illustrator or Inkscape.
The downloaded .svg includes all the details that also show up in the printed pattern, such as name labels, seam allowance, fur direction indicators, etc. To help you work with the svg, the pattern is grouped into layers and objects: Each pattern piece is a separate object, allowing you to easily move and layout it. Within each pattern object are multiple sub-objects for labels, the fur direction, seam allowance, and more. This allows you to precisely edit each feature.
The svg is scaled according to the size you set in the size section. This way you can use the svg file as a base for laser cutting or embroidery or to get exact measurements for each pattern piece.
Now that you have the pattern, you can print it, transfer it to the fabric, and sew your pieces together for your plushie!
If you want to go one step further and share your pattern or project with the world, you can create a customizable sharing link! Learn how in the next chapter:
Next chapter: Sharing Your Project