 Plushify
Plushify uses .obj files to import models from 3D modeling software. However, not every .obj file is compatible with Plushify. This section describes how to create an .obj file that works with Plushify.
Find or create a low poly model of your plushie
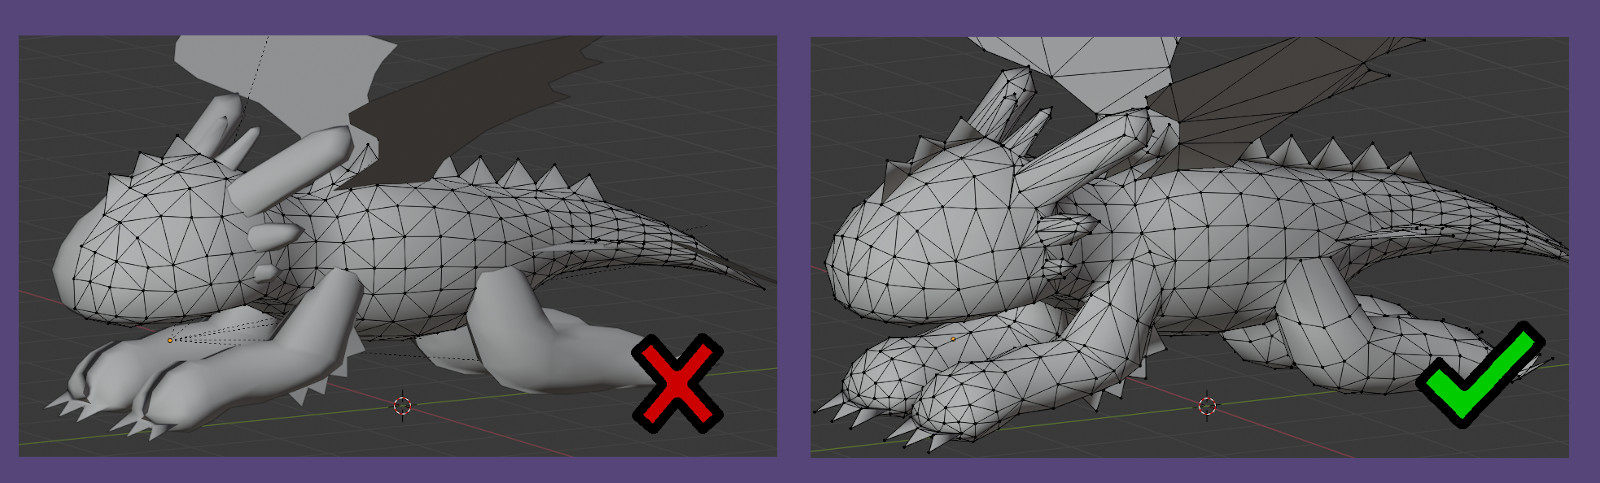
The best way to create a model for your plushie is to do it yourself. Use a 3D modeling program like Blender and make a polygonal model. Plushify works best with low-poly models. Often, very detailled structures can not easily be replicated in plush anyway. We generally recommend that models have a maximum of 10 000 vertices. You can try to import larger models, but this might make Plushify unresponsive.
There is a hard limit of 100k faces. When importing models with more than 100k faces, Plushify will automatically simplify the model, reducing details and potentially breaking symmetry. We strongly recommend retopologizing such models so they contain less than 100k faces and ideally less than 10k vertices.
Create edges for seams
The seams you will set in Plushify will follow the edges of the model. You need to make sure that there is an edge wherever a seam should be.
If you are not creating the model from scratch, but use an existing model from the internet, a 3D scan, or a sculpt, you likely need to clean up the topology before using it in Plushify. For Blender specifically, you can use two tools for this:
- Knife Tool: With this tool you can add additional edges where you want the seams to be
- Retopology Tools: If the edges of your model are very messy, you can use these tools to reduce vertex count, improve the mesh, and add edges for the seams
Notes for using models from the internet
If you do not have much experience with 3D modeling, you might be tempted to use a 3D model from the internet. While this is a valid approach, please open the file in a 3D editor like Blender first and make sure the edges of the model are suitable for seams. If not, follow the instructions above to improve the model before importing it in Plushify.
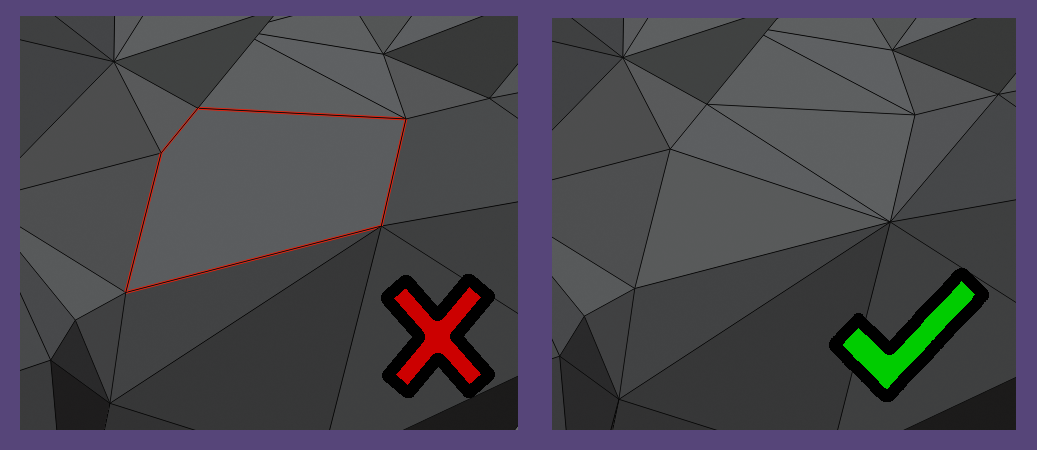
Make sure the model has tris and quads only
Whether you made the model yourself or found one on the internet, it is
important that the model has tris and quads only. While ngons are useful
in modeling, they can not be processed by Plushify. In Blender there is
a useful shortcut to
triangulate selected faces.
Make sure your scene contains only one mesh
Before exporting the model as .obj, it is important that everything that is not the plushie model is removed from the file.
The plushie itself should also be a single mesh. If you used multiple meshes to model the plushie, e.g. to have flexibility for the positioning of limbs, make sure to merge them into a single mesh and to remove any duplicated vertices.
It is also advisable that the mesh does not contain any disconnected parts. The exception to this rule would be if your plushie has features that are sewn on instead of sewn in. E.g. if you are making a dragon plushie and want to attach the horns separately after the plushie body is finished, you can have the horns as disconnected parts in the 3D model.
Export the model as .obj
The last step is to export the model as .obj file. This is a very common file format so every modeling software should support it.
Now you can use the exported .obj file with Plushify. The next chapter describes how to create an account in Plushify.
Next chapter: Creating and Managing a Plushify Account